Are you looking to take your WordPress site to the next level? Have you been wondering what the advantages of using a staging environment are? In this guide, we’re going to show you how to set up your own WordPress staging environment and explain why it’s so important to use a staging site.

Let’s get started!
Introduction to WordPress Staging Website and Its Benefits
As a website owner or developer, it’s important to be able to make changes to your site without risking your live site going down. This is where a WordPress staging area comes in. A staging environment is an exact replica of your live website, allowing you to make changes in a safe and secure environment before pushing them to the production site.
Using a staging server can help you avoid any potential problems and reduce or eliminate downtime when making changes. It can also help ensure that any changes made are of the highest quality before they go live. In this guide, we’ll explain what WordPress staging is, why it’s important, and how you can set up your own staging environment.
Set up a WordPress Staging Environment
Creating a WordPress staging environment is an essential part of keeping your website safe and secure. It allows you to make changes to your site in a safe environment without affecting the live version of your website. In this tutorial, we’ll show you how to easily create a staging environment for your WordPress site.

First, you will need to sign up for a hosting account with a provider that offers WordPress built-in staging feature. Next, you will need to create a new staging site by following the steps outlined by your hosting provider.
Once you have created your staging site, you can start making changes to it without affecting the live version of your website. You can also test new plugins and themes on the staging site before installing them on your live wordpress website.
When you are happy with the changes that you have made on the staging site, you can transfer them over to the live website. This way, you can be sure that any potential issues have been tested in a secure environment before they are applied to your live website.
By creating a WordPress staging environment, you will be able to confidently make changes to your website without risking any downtime or data loss.
Updating Your WordPress Core, Plugins and Themes Safely
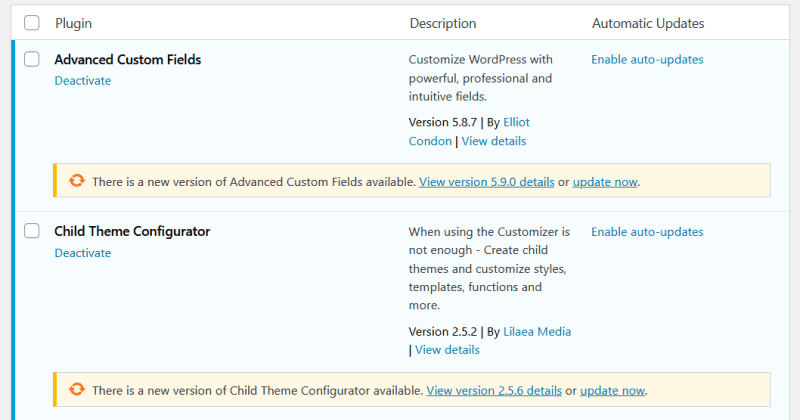
Keeping up to date with WordPress core, plugins and themes is an important part of maintaining a secure and stable WordPress site. Thankfully, with the help of a staging site, you can make sure that any updates you make are safe and tested before going live.

Updating your WordPress core, plugins and themes safely with a staging environment involves making a clone of your website and then making changes to that cloned version. This allows you to test the changes in a secure environment before transferring them to your live website.
To update your WordPress core, plugins and themes safely, follow these steps:
1. Create a staging website by making a clone of your website.
2. Update the WordPress core, plugins and themes on the staging version of your website.
3. Access your staging site and make sure the changes work as expected without any issues.
4. Transfer the changes from the staging environment to your live website once everything is tested.
5. Troubleshoot any issues with your staging environment in case of any problems.
By following these steps, you can make sure that any updates you make to your WordPress core, plugins and themes are properly tested before they go live on your website. This helps keep your site secure and stable while also making sure that you take advantage of all the latest features and bug fixes available for WordPress.
Testing Changes to Your WordPress Site
Testing changes to your WordPress site can be a risky endeavor, as any mistakes can impact the user experience and cause downtime. To ensure your website remains safe and secure, it’s important to test out any changes on a staging site, which is a private copy of your website. This way, you can make changes and test them out without impacting the live website.
Here’s how to test changes on your WordPress staging site:
1. First, create a staging site by cloning your production website. This will give you an exact replica of your site that you can use for testing.
2. Once the staging site is set up, log in and make the changes on the staging you want to test. This could include installing a new theme, making code modifications, or testing out new plugins.
3. Once you’ve made all the changes, check that everything looks and works as expected by running through the same user journeys that are used on the live website. This will help ensure that all new features are working correctly and that any modifications haven’t impacted existing functionality.
4. If everything looks good, then you can deploy those changes to your live website knowing they won’t cause any issues. Make sure to back up both the staging and live sites before doing this just in case anything goes wrong during the transfer process.
By testing out changes on a WordPress staging site first, you can ensure that they won’t cause any disruption or downtime on your live website. This way, you’ll be able to deploy new features and improvements with confidence knowing that everything works as expected.
How to Set Up Your WordPress Staging Site
Setting up your WordPress staging site is quick and easy. All you need is a staging plugin that will create a copy of your live website. Then, you can make changes to the staging site with confidence knowing that your live website is still intact and then push your staging site to the production site. Here’s how to do it:
Step 1: Install a Staging Plugin
The first step is to install a staging plugin, such as the one offered at wpvivid.com. This plugin will clone your main site and create an exact replica on a private, secure space. This will make it easier for you to test out changes before implementing them on the live website.
Step 2: Create a WordPress Staging Site
Once you’ve installed the staging plugin, you can create a new site. This will be an exact clone of your live website, so you can test out plugins, themes and other changes without endangering your live website.
Step 3: Make Changes To Your Staging Site
Now that you have your staging site set up, you can start making changes to it. Try out different themes and plugins, or add custom features and code snippets. The staging environment allows you to experiment freely without worrying about breaking the live website.
Step 4: Deploy Changes To The Live Site
Once you’re happy with the changes, you can deploy them to the live website with the push of a button. This will ensure that any changes made to the staging site are implemented on the live website without any issues.
With these simple steps, you can create a secure WordPress staging site in no time. Now that your WordPress staging environment is set up, you can start developing and testing changes with confidence knowing that your live website is safe and secure.
Creating a Local WordPress Website
Creating a local WordPress website is a great way to test changes or develop new features without having to go through the hassle of setting up a staging site. Setting up a local WordPress website is relatively easy and straightforward. In this section, we’ll cover the steps needed to create a local WordPress website for testing and development.
First, you’ll need to download and install a web server package such as WampServer or XAMPP. These packages will allow you to run a web server on your own computer, allowing you to run WordPress locally.
Once you have installed your web server package, you will need to download the latest version of WordPress from the official website. Once downloaded, you can install it on your local server by following the instructions provided by your web server package.
After that, you will need to create a database for your local WordPress website. You can do this using phpMyAdmin or other database management tools that are usually included with your web server package.
Finally, you will need to configure your local WordPress website with the details of your database and web server. You can do this by editing the wp-config.php file in the root folder of your WordPress installation.
Once all of these steps are complete, you should be able to access your local WordPress website by typing in “localhost” in your browser’s address bar. With a local WordPress website, you can safely test new features, plugins, and themes without affecting the live version of your website.
Testing New Themes and Plugins
Testing new themes and plugins is an important step before rolling them out on the live website. With a WordPress staging site, you can easily test new plugins and themes without affecting your production website. Here’s how to do it:
1. Copy your website to your staging environment using WP Staging or any other staging plugin.
2. Activate the plugin or theme you want to test in the staging site url.
3. Check if all of the elements of your website are working as expected.
4. If everything works, you can go ahead and deploy the changes to the live website.
5. If something isn’t working as expected, you can make changes in the staging environment without affecting your live website.
6. Once you’re satisfied with the changes, you can deploy them to the live website.
Transferring Changes From Staging to Live Website
Transferring changes from your WordPress staging site to the live website is an important step in the web development process. It allows you to ensure that any modifications and improvements you have made to your site are safe and secure before they are released to the public.
Fortunately, transferring changes from staging to live is an easy process if you know what you’re doing. Here’s a step-by-step guide on how to successfully transfer changes from your staging site to a live website:
1. Log into your WordPress staging site and check that all the changes you have made are working as expected. Make sure that all the plugins and themes are up-to-date and that there are no errors or conflicts.
2. Once you’re satisfied that everything is running smoothly, it’s time to create a wordpress backup of your staging site. This is important in case anything goes wrong during the transfer process. You can use a plugin such as WP STAGING to quickly and easily create a backup of your staging site.
3. Log into your live website and install a plugin such as WP Migrate DB Pro or Duplicator Pro, which will allow you to migrate the data from your staging site to the live website.
4. Run the migration tool on both sites, following the instructions provided by the plugin. This will transfer all of your data from the staging site to the live website, including any changes or modifications you have made.
5. Once the migration is complete, log into your live website and check that all of the changes have been transferred successfully. Make sure that all of your plugins and themes are still up-to-date, and that there are no errors or conflicts with any of them.
6. If everything looks good, then congratulations! You have successfully transferred changes from your WordPress staging site to a live website!
By following these steps, you can easily transfer any changes you have made on your
Troubleshooting Issues with Your Staging Site
Troubleshooting Issues with Your Staging Site
No matter how careful you are, things can still go wrong when testing your site on a staging environment. Here are a few tips for troubleshooting common issues:
1. Check the server logs: If something isn’t working as expected, the server logs can provide valuable information about what went wrong. Check the WordPress debug log and server error logs for any errors that are being logged.
2. Enable WP_DEBUG: When testing on a staging site, it’s a good idea to enable WP_DEBUG to make sure that any errors that occur are logged. This can be enabled by adding the following line to the wp-config.php file: define(‘WP_DEBUG’, true);
3. Inspect the staging site’s code: If you’re having trouble with a particular page or feature, you can use your browser’s developer tools to inspect the HTML, CSS, and JavaScript code of the page in question. This can help you identify any code errors that might be causing the issue.
4. Test in different browsers and devices: It’s important to test your site in multiple browsers and devices to make sure that it looks and functions correctly across different platforms.
5. Test with different user roles: Make sure that you test your site with different user roles (e.g., administrator, editor, etc.) to ensure that all of the features are working correctly for different types of users.
By following these tips and using a WordPress staging site, you can ensure that your website is functioning as expected before making any changes to your live site.
