Are you a WordPress user who wants to make sure your content is safe and secure? Are you looking for an easy way to back up your WordPress site? Backing up your WordPress site doesn’t have to be difficult. In this blog post, we’ll show you how to quickly and easily backup your WordPress site with just a few simple steps.
Introduction to Backup WordPress Blog
Backing up your WordPress blog is essential for keeping your website safe and secure. With regular backups, you’ll be able to restore your website quickly and easily in the event of an emergency. Making sure that you have a reliable backup solution is one of the most important steps in maintaining a successful website.
In this guide, we’ll go over the different ways you can back up your WordPress blog, including manual backups using FTP and phpMyAdmin, automated backups using plugins, and downloading a copy of your backup file. We’ll also discuss how to choose a storage option for your backups and how to schedule regular backups. Let’s get started!
1. Create a Manual Backup via FTP and phpMyAdmin
Backing up your WordPress blog is an essential part of website maintenance. In this section, we’ll show you how to create a manual backup of your WordPress site using FTP and phpMyAdmin.
To start, you’ll need to download and install FileZilla FTP client (free and open-source). Once you’ve downloaded and installed the client, use your FTP credentials to connect to your web server.
Once connected, navigate to the root directory of your website in the file manager. This will be either “public_html”, “html”, “blog”, or it may be readily visible once you connect. You’ll then be prompted to create a folder. In this demo, we’ll use “wordpress-backup” as the folder name.
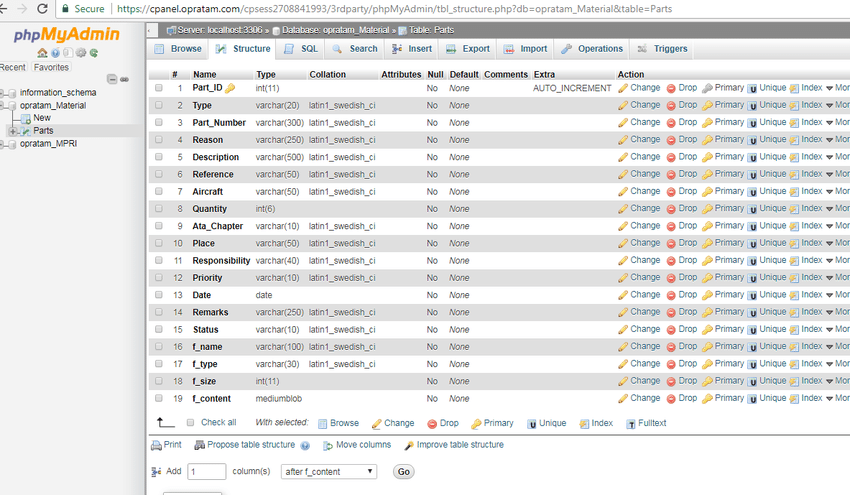
Next, you will need to create a backup of your WordPress database. To do this, log into phpMyAdmin and select your database from the left menu. Then click on the “Export” tab at the top of the page and select “Custom – display all possible options” from the export method drop-down menu. Finally, click on Go at the bottom of the page to generate your database backup.
Once you have successfully created a backup of your WordPress database and downloaded it to your local machine, you will need to upload it to the “wordpress-backup” folder that you previously created via FTP.
Finally, you will need to backup your WordPress files. To do this, select all files in the root directory of your website (except for the “wordpress-backup” folder) and download them to your local machine. Once downloaded, upload all files in the “wordpress-backup” folder via FTP.
Congratulations! You have successfully created a manual backup of your WordPress blog
3. Use a WordPress Backup Plugin to Automate the Process
Backing up your WordPress blog can be a tedious task, but it doesn’t have to be. With the help of a WordPress plugin, you can automate the process and create backups quickly and easily.
There are several WordPress plugins that are designed for backing up your blog. One of the most popular is UpdraftPlus, which is a free plugin available from the WordPress repository. This plugin allows you to create a complete backup of your WordPress site and store it on the cloud or download to your computer. The plugin also has an easy-to-configure settings page where you can customize what you want to backup, how often you want to back up, and where you want to store the backups.
Another popular plugin for backing up WordPress is BackWPup. This plugin also allows you to back up your entire WordPress site and store it on the cloud or download it to your computer. Additionally, with this plugin you can customize what files and folders you want to include in the backup and schedule regular backups.
Once you have installed the plugin, there are a few steps to take in order to run the backup:
1. Configure the settings page in the plugin and select what files and folders you want included in the backup.
2. After configuring the plugin settings, click “Backup Now” on the plugin page to perform your first backup.
3. Choose a storage option for your backups, such as Dropbox or Google Drive.
4. Download a copy of your backup file and save it in a safe place.
5. Test out the backup file by restoring it to make sure it works correctly.
By using a WordPress plugin like UpdraftPlus or BackWPup, you can automate the process of backing up your WordPress blog and ensure that your site is always protected in case of any unforeseen issues or disasters.
4. Backup Your WordPress Database
Backing up your WordPress database is a simple process. You can do this in two ways, manually or with a plugin.
Manual Backup: To manually backup your WordPress database, you will need to use phpMyAdmin. Log in to your hosting control panel and click on the phpMyAdmin link. This will open up your database and allow you to export the entire database as a .sql file.
Plugin Option: If you want to automate the process, you can use a WordPress plugin such as UpdraftPlus or BlogVault. Once installed and activated, these plugins will allow you to easily backup your WordPress database with just a few clicks. You can also set up regular backups and choose where you want the backups to be stored.
5. Backup Your WordPress Files
Backing up your WordPress files is also an essential part of protecting your blog from any potential damage. To do this, you need to access your hosting control panel and find the File Manager or FTP tool. Once you’ve accessed it, you can log in with your account details and select only the files you want or the public_html folder to restore the entire site. You can either download the backup files or restore them by uploading them to your hosting account. It’s important to make sure that you are backing up all the necessary files needed to restore your site. Once you have successfully backed up your WordPress files, you can now move on to backing up your database.
6. Choose a Storage Option for Your Backups
Backing up your WordPress blog is an essential part of keeping it secure and up-to-date. It’s important to choose the right storage option for your backups in order to ensure that they are safe and easily accessible.
The default location for storing backups is your cPanel. Log into your cPanel and navigate to the “Databases” tab. Here you can find the database that you need to export and make a backup of. Once you have identified the database, simply click “Backup” to generate a backup of your site.
Alternatively, you can use a WordPress plugin such as UpdraftPlus to automate the process. UpdraftPlus allows you to create a scheduled backup, so that backups are created automatically at regular intervals. You can also choose which files you want to include in the backup, such as themes, plugins, images, and other files. Once the backup is complete, it will appear in the available backups section and can be downloaded or restored as needed.
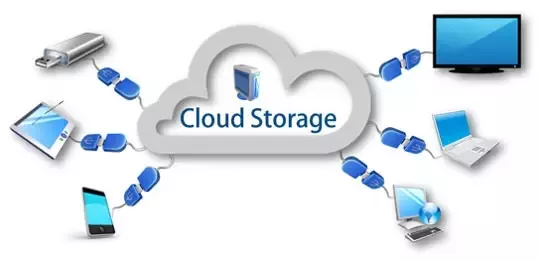
When choosing a storage option for your backups, you should consider the cost and reliability of the service, as well as how easy it is to access the backups when needed. Some popular options include cloud storage services like Dropbox and Google Drive, external hard drives, or even physical media like CDs or DVDs. Make sure that whatever option you choose is secure and reliable, so that your data is always safe and accessible when needed.
7. Schedule Regular Backups
Scheduling regular daily backups for your WordPress blog is essential for keeping your data safe and secure. There are two main methods for scheduling automatic backups: using a plugin or using your web hosting provider’s cPanel.
Using a Plugin:
There is no shortage of backup plugins available for WordPress, and they can make setting up a backup schedule easy. Once you’ve installed your plugin of choice, simply open the ‘Files backup schedule’ dropdown and choose how frequently you’d like UpdraftPlus to backup your WordPress website.
Using cPanel:
If your web hosting provider offers cPanel, you can use it to manage and schedule backups. Accessing cPanel is simple; just log into your hosting account and look for the “cPanel” option in the dashboard. Once you’ve logged in to cPanel, look for “Backup Wizard” under the “Files” section and follow the instructions. This will help you set up automated backups according to a schedule that works best for you.
Remember to always keep a copy of your backup file stored in two different locations; this will ensure that you always have a copy should one location become unavailable. Regularly testing out your backup files is also recommended to make sure that they’re working correctly.
8. Download a Copy of Your Backup File
Once your backups have been created, it’s important to download a copy of them to your local computer. This allows you to have an offline version of the backup, which can be used to restore your WordPress blog should anything happen to your hosting server.
To download a copy of the backup file, simply select the file and click the “Download” button. The file will then begin downloading automatically. Once the download is complete, you can store the file on your local computer or external storage device for safekeeping.
9. Test Out the Backup File
Once you have generated a backup of your WordPress site, it is important to test it before restoring it. To do this, you can use a plugin like BackupBuddy to create a staging site. This is a completely separate version of your site, which you can use to check the functionality of the backup files without risking any damage to your live site.
Once the staging site is set up, you can use the BackupBuddy plugin to restore the backup file to it. This will allow you to check that all of your content, settings, and data are as they should be. If there are any issues with the restore process, you can troubleshoot them before attempting to restore the backup file to your live site.
It is also a good idea to create a backup of the staging site, in case anything goes wrong during testing.
Once you have tested the backup file and confirmed everything is working as expected, you can then restore it to your live WordPress site.